In order to be able to actually watch the 2006 Winter Olympics while knitting the Dianna sweater designed by Adrienne Vittadini, I needed to have a detailed chart.
Most knitting charts that come with patterns for garments are just charts of the stitch design(s) used in the item. This is helpful, but since the patterns don't layout the entire garment in a chart, you can easily get lost on a complicated project if you are not being religiously focused. So, if you typically have an attention deficit, and you add to that the distraction of watching a pair of ice skaters execute side-by-side triple axels, you could have a veritable tangled-up mess trying to knit a lace sweater at the same time as watching the Olympics.
While waiting for my yarn for the tango sweater to arrive from Australia, I pondered this and wondered how I, a novice at knitting lace, could meet the challenge.
Some Ondori crochet books in my library got me thinking. These Japanese pattern books have immensely intricate and intelligent crochet charts that are so good you hardly ever have to refer to the written instructions. The various crochet stitches in a complex lace pattern is no problem to follow because the graphic layout of the various stitches in their exact placement in the project is such a marvelous visual guide. I had crocheted many a doily without reading a word of text by just following the charts.
Why couldn't knitting charts be this thorough? Knitting would seem to be easy to lay out because it is essentially a grid of stitches. This is the thought process which let me to open Microsoft Excel for Mac and start chunking out a chart for each piece of Dianna.
As far as I can remember, here are the steps that you would need to do this (in case you are as crazy as I am and want to try this at home):
- Download a knitter's symbol font and install it.
- Open Microsoft Excel.
- Figure out how in the heck to type the correct font symbols.
- Set up a blank worksheet page for each piece: back, sleeve, right front, left front and back.
- Reduce the cell size globally to a small size that is just large enough to accommodate a single font symbol.
- Set up a legend/key of all the symbols needed for the pattern: see the green box on the illustration of the beginning of the right front.
- Create the outline of the piece by laying out the cast-on row and the selvedge stitches. [In the photos and illustrations the selvedge stitches (cells) are shown in orange.]
- Fill in the first row after the cast-on row at the bottom of the grid. (For this step, you CAREFULLY read the pattern instructions and cut & paste symbols from the legend into the appropriate grid space, building the bottom row from right to left just as you will be knitting it.)
- Then fill in rows 2-18 still working VERY CAREFULLY!

- Now the fun part begins because you can cut & paste whole sections like snippets of code. See the two red rectangles drawn on the grid?--They outline two identical motifs. You can fill in the outline created in Step 7 with columns and rows of these pattern motifs by using Excel's cut & paste feature. Click on the illustration for a close up view.
- After as many motifs are pasted that will fit logically inside the outline, you start filling in the beginning and endings of rows and all the blank space remaining, using the written words of the pattern as a guide. Here's the top of the right front sweater:

- Wahoo! Go have a glass of wine.
- Repeat steps 7-12 for each remaining pattern piece.
Here's the complete back chart:
Here's a side front and a sleeve:
It took around 25 hours of training to build these charts and knit a couple swatches. It kept me busy while I was waiting for the Carmen red cotton to arrive from Australia. The night of the opening ceremonies, the yarn had still not been delivered, so the opening ceremonies were spent finishing the final grid for the sleeve.
It took around 25 hours of training to build these charts and knit a couple swatches. It kept me busy while I was waiting for the Carmen red cotton to arrive from Australia. The night of the opening ceremonies, the yarn had still not been delivered, so the opening ceremonies were spent finishing the final grid for the sleeve.
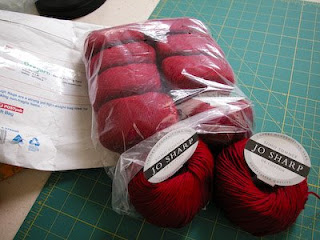
Finally, the very next morning, and not a moment too soon, the package arrived:


No comments:
Post a Comment